Showing posts with label germination. Show all posts

Friday, November 19, 2010

Seeding is believing

When little cotyledons (first leaves) punch through the soil and unfurl to soak up the sun, I get a thrill from knowing that I turned a dormant seed into a living thing.  Well, oxygen, water and a little heat did, but I facilitated those conditions.

It has been even more satisfying to grow those seeds into a plant that has blossomed and produced more seeds.  As I harvested seeds and replanted them, I hardly dared believe that they would germinate.  It seems naff to call such a gentle process as germination exhilarating, but the success of my second generation seedlings has me on a high.

Many times a gardener is actually annoyed when a plant goes to seed.  Bolting lettuce means that the leaves turn bitter as their goodness (and sweetness) is diverted to seed making.  Producing seed is the plant's ultimate goal, and we gardeners often try to prolong the life of many of our plants by dead heading them to stop this process and channel the plant's life force back to blossom or root storage.

Around this time last year, I inadvertently bought and planted heirloom broccoli seeds.  At the time I didn't know what "heirloom" meant. During my Saturday morning classes, last year, I learned that heirlooms were a good thing.  If you saved the seeds from an heirloom plant they tended to grow plants very true to the type of the parent plants as opposed to hybrid seeds, most often used in agriculture, and which do not produce offspring true to the characteristics of the plant they came from.  So in summary - Heirloom = good seeds, non-heirloom or hybrid = not so good seeds.

If a seed is a heirloom seed, it will have heirloom written on the packet.

So, back to the broccoli; I started with twelve seeds and they all germinated. They grew really well and produced very tasty broccoli right through from about last January.    The  plants grew huge - nearly 7 feet high when I finally cut them down last week.

During the summer, we had to spend a few weeks in Hong Kong, and  by the time we got home many of the non-harvested broccoli florets had begun to blossom.
Normally, I would pick this then compost it, but I decided to let it grow into seeds.  In the meantime, I planted more seeds, from the packet, in another of my raised beds so that I would have broccoli when these were done.

Seed pods formed slowly but surely. It required patience and the ability to turn a blind eye to an unkempt look to this part of the garden.  But eventually there seemed to be seeds in the knobbly pods.
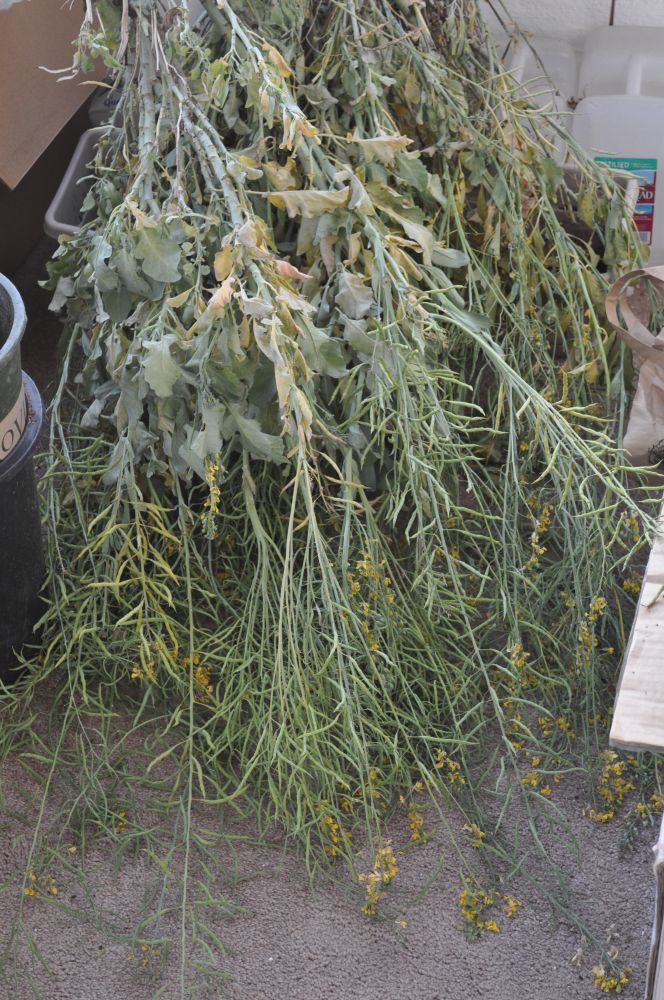
I cut the broccoli down and stored it somewhere dry to allow the seeds to draw the last of the goodness from the plant while they matured and and the pods dried out.
Once the seed pods start to dry out, it is best to put them into brown paper bags.  This way, if the pods splits and the seeds are spilled, you can catch them in the bottom of the bag.  I did this for all my seeds and labeled the bags (with the original seed packet if possible, so you can identify them and you have the planting instructions too.) By fortunate coincidence, my lettuce and arugula are also heirloom seeds, again bought before I knew what that meant.
The broccoli seeds are like miniature peas inside a miniature pod!

As are many of the seeds that plants produce. Here are some arugula seed pods.
The lettuce seeds were more like dandelion seeds, wind dispersed.
 
The lettuce seeds are tiny - each with their own little parachute.

So, I also had bunching onions in my garden which I had gotten as seedlings.  They flowered with big white showy blossoms.
As the flowers died back, I gathered up the dried heads and saw they contained little black seeds. 
 
We are still eating all other parts of these onions - the slightly bulbed root, the white stem and the green leaves.  Flowering did not seem to diminish the tase at all.  Even though these weren't described as "heirloom" I decided to plant them anyways.  What did I have to loose? It was another of my garden "experiments".

Likewise, my sweetpea blossomed gloriously in the early summer, and I allowed a couple of plants to go to seed, even though these are not heirloom either.
I gathered the little non-edible seed - how ironic is it that the variety you don't eat is the one that sounds tastiest?

Some basic rules about seed saving and germination
  1. Try to let the seeds ripen as fully as possible before you harvest them.
  2. If you find insects on your seed pods throw them out or use diatomaceous earth to destroy the critters. They'll eat your seeds if you don't, and possibly spread to the entire crop.
  3. Keep the seeds cool and very dry - use little silica packets (like the ones you get with new shoes) to help absorb water whilst storing them. This is a good use for your old jam jars - remember to label them with the year they were collected.
  4. Seeds will be viable from about 3-5 years.  You can test a sample for germination by putting them on damp kitchen roll to see what percentage germinate.
  5. Germination requires - warmth, oxygen and water. Very few plants require light (e.g. chamomile) to germinate.  Most are not affected by light and a few are prevented from germinating if there is light present.
So, I planted all my seeds and hey-presto, they all germinated - even the non heirlooms (though they still may not blossom nor bear fruit ).

The arugula:
The mixed leaf lettuce, where you can see two different types of cotyledons:

And just look at those broccoli grow:
Even the non-heirloom seeds have come up, and we've been harvesting the onions and using them like scallions - they taste great!
I'm still hoping that the sweetpea will blossom .
 Even if they don't I haven't lost anything by trying it.

That's the beauty of seed saving (especially heirlooms) - it saves you having to buy seeds every season and it means that the big seed companies and the government aren't the only ones with seeds.

In addition to this using heirloom seeds perserved genetic diversity amongst the vegetables and tend to taste better.  Heirlooms are typically better adapted to growing where they having been growing for some time and are thus more disease resistant, tolerate local weather conditions and repel local pests better.

It makes me feel weirdly attached to these little "children" of the plants that I grew.  It's great to see them growing happily in my garden, and I can't wait to eat 'em

Byddi Lee


Friday, March 12, 2010

Springtime – A Myriad of Miracles

Sometimes, it’s the small things in life that make my heart glow.  When I say small, I mean measuring about one eight of an inch (3-4mm), like the tiny cotyledons, the first leaves, of a germinating seed poking bravely up through the soil.

This is a sugar snap pea and my finger - my finger is the pink one!

It always amazes me that a shiny, stone like seed can transform into a green, growing, living thing.  Nature’s struggle for survival is truly amazing.

Spring has sprung, and it made me think of all the ways we gardeners get things to grow.  We buy plants already started, like I did when I started my native plant shade garden.  It’s a buzz to see them prosper, get stronger and even blossom.  My neighbor, Al, dug up some oregano and chives from his garden and gave them to me.

In the background you can see (from left to right) dill, basil and coriander/cilantro (depending on which country you are reading this from).  

I do prefer to try to grow things from seed.  I get such a thrill from germination.  Did I really write that?  Perhaps I should get out more.  But it’s true!  And it’s cheaper. 
This is baby basil. Cute!

Last night, as I munched on delicious sugar snap peas, I thought about how I had put those little green seeds into the garden last October, and now we have food.  The pea flowers were pretty too.  Here are some photos that my friend and gifted photographer, Cait Hutnik, took of them.


Even when the odds are against survival, nature doesn’t give up.  We had an old cherry tree with a rotted trunk.  On Al's advice, an expert in growing fruit trees, we cut down the tree and replaced it with another cherry. 
  

The cherry tree stump.

Cherry branches grow very straight, and I saved a few of the smaller limbs to use as rods for my newly sewn pea plants.  A week later, the buds on the twigs had burst and blossoms were flowering - the tree that grew them, long since gone.  It was as if they were ghost flowers.  Cait was captivated by these also and took some beautiful shots.  You can see more of her amazing photographs on her Light of Morn website.


Al and his wife, Karla, helped me choose three new fruit trees for the garden to replace other trees that had either fallen down or were too old and needed taken down.  I chose a cherry, an almond and a nectarine tree. 

The local adult education center had free classes in January about grafting.  Never one to overlook free stuff, I attended and was inspired to have a go.  Al knows all about grafting.  Each of his fruit trees sport different colors of blossoms on the same trunk where he has grafted different species together.


I understood the biology of it - bring two branches together, their cambium tissue (the growing tissue that  produces new cells continually, just under the bark) touching and they will fuse together.  It’s just hard to believe that if you stick a plum twig, no more than 3 inches long, onto the end of an almond branch that it will actually grow there.

Al gave me grafts or scions, as the twigs are called, for each of my new trees and showed me how to do the first one.  He had the grafting tar and tape and generously gave them to me for the other two grafts.  He told me to check the grafts every couple of days and then laughed - knowing I’d be out everyday, hail rain or shine inspecting them!  After a couple of weeks the buds seemed to be swelling, but it was hard to tell, because as Al had predicted, I was scrutinizing them on a daily basis, even multiple times a day.

First thing I did when I got back from the Grand Canyon trip was go check on the grafts – and joy of joys, one of them had burst into leaves!  Within a few days it was obvious that they had all taken.  Another garden miracle!  And now I'm a believer....next year I plan to graft some more.
  
This is a different type of cherry grafted to the new cherry sapling.
This is a peach scion on the almond tree - (I think!  Lesson learned here - write it down when you do the graft!)
 

This is also one of those mystery ones!  I'm nearly certain it is plum, grafted on to nectarine. 

Cait captured the nectarine's amazing pink blossoms!
Bulbs, rhizomes and tubers also amaze me.  Bulbs look so dead when they are dormant, but grow into such beautiful flowers.  Daffodils were my Dad’s favorite flower. 
With rhizomes and tubers, you break a piece off a plant (or buy it at the supermarket – even more fascinating) and hydrate it, or in some cases you can stick it straight into the ground, and hey presto you have new, identical plants. This works for potatoes, garlic and ginger.  I bought garlic from the supermarket and just let it start growing in a cupboard.  When the shoot was about half an inch long, I planted them, last December.

Same with some potatoes:

I tried it with sweet potato, and it didn’t work, but it should.  I think it was too cold when I did it, hence the gap at the end of the row where my one sweet potato plant should be (note the label!).  I’m planning on trying again when the weather is warmer.


This is my first time trying ginger, and I’m only at the stepping it in water stage, though I will keep you posted.


Then there are the plants whose stems you stick in water and they magically produce roots (sometimes with the help of a little rooting hormone).  I’m trying this with lavender and rosemary, though the lavender looks like it is wilting.  The rosemary looks happy enough.  Notice the fancy designer plant pot!


Lemon grass falls between this category and the next – I’m soaking the very bottom of its stem, i.e. where its roots would have been before they were cut off.  According to 'You Grow Girl', roots will develop and I can grow this also at home.  My grocery list is getting shorter and shorter!


My spider plant is magnificent!  In fairness, it’s nearly impossible to kill a spider plant, although my green fingered mother is the only person I know of who has achieved it. 


I love when it produces babies.  I pot them up and give them to friends.  Even my friend Eileen, the self proclaimed, notorious plant murderer, has managed to keep the one I gave her alive!


Here is another example of vegetative propagation - aren’t the babies cute!  This was a present from my friend, Thanh, who has a veritable nursery of succulents and their babies.


Many succulents and cacti do this.  It works well, especially for cacti that may have to wait a long time for rain to germinate seeds.  They clone themselves, and as their environment is usually very stable and doesn’t change much they are not disadvantaged by the lack of variation typical of asexual reproduction.
 
Isn’t nature just magical – and if these examples weren’t proof enough, here is the view from my garden one rainy day last week, some where under the rainbow.

  
Byddi Lee